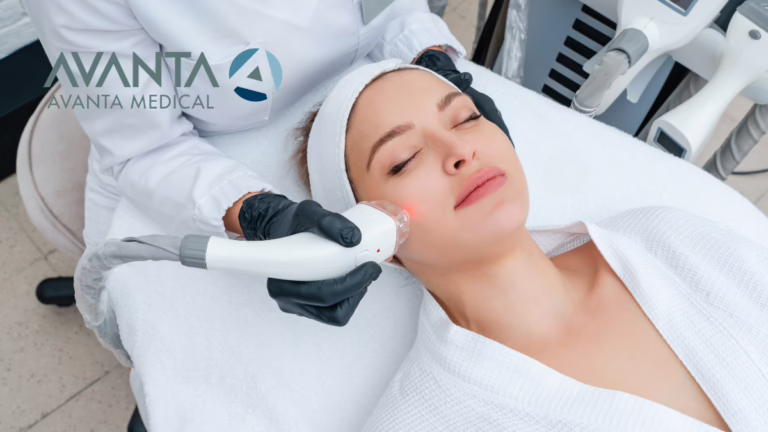
How to Use Exosomes After Laser Treatment: A Step-by-Step Clinical Guide
Laser treatments are among the most powerful tools in aesthetic medicine — but the results don’t end when the session does. What happens after the laser is just as important as the treatment itself. This is where exosomes after laser treatment have become one of the most exciting and clinically relevant advances in regenerative aesthetics.
By applying exosomes immediately following laser procedures, clinicians can accelerate healing, reduce downtime, calm inflammation, and significantly amplify the overall treatment outcome. Whether you’re working with a fractional CO2 laser, a diode laser, pico laser, or IPL, incorporating exosomes into your post-treatment protocol is a game-changer for both patient experience and clinical results.
This guide walks you through the step-by-step process of using exosomes after laser treatment, including preparation, application, aftercare, and best practices for maximizing efficacy.
What Are Exosomes and Why Do They Work So Well After Laser Treatment?
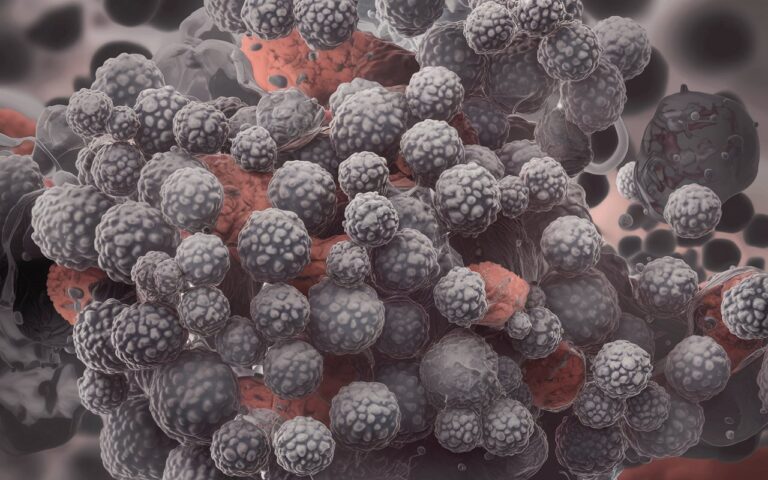
Exosomes are nano-sized extracellular vesicles naturally produced by cells to carry proteins, lipids, and genetic signals between cells. Think of them as the body’s internal messaging system — tiny packages of biological information that tell surrounding cells how to respond, repair, and regenerate.
When applied to skin immediately after a laser procedure, exosomes deliver a concentrated dose of growth factors, cytokines, and signaling molecules directly into the skin’s most receptive state. The micro-channels created by laser energy allow deeper penetration than topical products can normally achieve — making the post-laser window one of the most optimal moments for exosome application.
The result: faster healing, reduced redness and inflammation, enhanced collagen stimulation, and dramatically improved treatment outcomes.
For a deeper look at how exosomes communicate with skin cells at a biological level, read our post on Exosome Skincare Benefits: How Exosomes Communicate with Your Skin.
Table of Contents
- Which Laser Treatments Benefit Most from Exosomes?
- What You Need Before You Begin
- Step 1: Complete the Laser Treatment
- Step 2: Cleanse and Prepare the Skin
- Step 3: Prepare Your Exosome Solution
- Step 4: Apply Exosomes to the Treatment Area
- Step 5: Allow Full Absorption
- Step 6: Apply Finishing Protection
- Step 7: Provide Patient Aftercare Instructions
- Storage and Handling Best Practices
- Pairing Exosomes with AVANTA Devices
- Frequently Asked Questions (FAQ)
Which Laser Treatments Benefit Most from Exosomes?
Exosomes after laser treatment are beneficial across a wide range of energy-based procedures, but they are especially impactful following treatments that create controlled skin injury or significant thermal stimulation:
- ✅ Fractional CO2 Laser (CO2Pro) – Post-resurfacing exosome application accelerates re-epithelialization and dramatically reduces downtime
- ✅ Diode Laser Hair Removal (TrioPro) – Soothes post-treatment inflammation and supports skin barrier recovery
- ✅ Pico Laser (PICOPro) – Enhances pigmentation clearance and collagen remodeling post-treatment
- ✅ IPL / Intense Pulsed Light (LightPro) – Supports skin rejuvenation and reduces post-treatment redness
- ✅ Microneedling / RF Microneedling (DermaPro) – Maximizes collagen induction results when exosomes are applied immediately after
The more ablative or intensive the treatment, the greater the benefit exosomes can provide in the recovery phase.
What You Need Before You Begin
- 🔹 SMART eXo Exosomes by AVANTA Medical (non-lyophilized, ready-to-use format recommended for clinical post-laser application)
- 🔹 Sterile saline or gentle cleanser for post-laser skin prep
- 🔹 Sterile gauze or cotton pads
- 🔹 Nitrile gloves
- 🔹 Broad-spectrum SPF 30+ for finishing protection
- 🔹 Written aftercare instructions for the patient
🔹 Tip: AVANTA’s SMART eXo is a non-lyophilized exosome solution — meaning it is ready to use without reconstitution, making it ideal for immediate post-laser application directly in the treatment room. For guidance on lyophilized exosome preparation, see our Exosome Reconstitution Step-by-Step Guide.
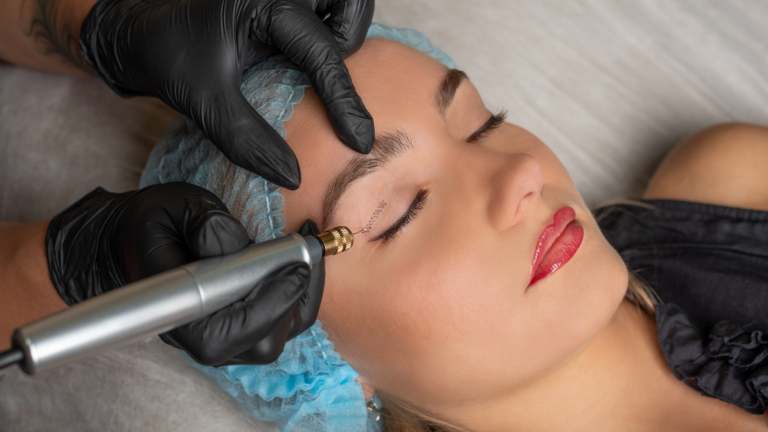
Step 1: Complete the Laser Treatment
Perform your laser procedure as planned — whether that’s fractional CO2 resurfacing, pico laser pigmentation correction, diode hair removal, or IPL rejuvenation. Do not apply any topical product to the treated area during or between laser passes, as this can interfere with energy delivery and treatment efficacy.
Once the final pass is complete, set the device aside and prepare for the exosome application phase.
🔹 Tip: The window immediately following laser treatment — while the skin’s channels are still open — is the optimal time for exosome penetration. Move to the exosome application step promptly, ideally within 5–10 minutes of completing the procedure.
Step 2: Cleanse and Prepare the Skin
Gently cleanse the treated area with sterile saline or a gentle, non-active cleanser to remove any residual laser gel, debris, or surface contaminants. Pat dry with sterile gauze — do not rub.
The skin should be clean, intact, and free of any active bleeding before exosome application. For ablative CO2 treatments, a light pinpoint bleeding pattern is normal — proceed once the surface is stable.
🔹 Tip: Avoid products containing alcohol, fragrance, acids, or active ingredients at this stage. The skin’s barrier is temporarily compromised post-laser, and anything irritating can cause adverse reactions.
Step 3: Prepare Your Exosome Solution
If using AVANTA’s SMART eXo non-lyophilized exosomes, the solution is ready to use directly from the vial — no reconstitution required.
If using lyophilized exosomes, reconstitute according to the manufacturer’s guidelines before proceeding. For a full guide on this process, refer to our Exosome Reconstitution: Step-by-Step Guide.
Ensure the solution appears clear and free of visible particles before application. Do not use if the solution appears cloudy, discolored, or has been left unrefrigerated for more than the recommended time.
🔹 Tip: Always work with a fresh vial per patient session. Never reuse or pool exosome solutions between patients.
Step 4: Apply Exosomes to the Treatment Area
Using a sterile dropper, pipette, or gloved fingertip, apply the exosome solution evenly across the entire treated area. Use gentle, patting motions — do not rub or massage aggressively.
Apply in 2–3 thin layers, allowing each layer to absorb before applying the next. The goal is full, even coverage across all treated skin without product pooling.
🔹 Tip: For fractional CO2 or microneedling treatments, the micro-channels created allow exosomes to penetrate significantly deeper than standard topical absorption. This is the highest-impact moment for exosome delivery — use this window to your clinical advantage.
Step 5: Allow Full Absorption
After the final layer of exosome solution is applied, allow the skin to absorb fully for 5–10 minutes. During this time:
- Keep the patient still and comfortable in the treatment chair
- Avoid any fan, cool air, or devices directed at the treatment area
- Do not blot or wipe — let the solution absorb completely
🔹 Tip: Use this absorption window to prepare aftercare materials and review post-treatment instructions with the patient while they rest.
Step 6: Apply Finishing Protection
Once exosomes are fully absorbed, apply a gentle, non-comedogenic broad-spectrum SPF 30+ to any areas exposed to natural light. For full-face ablative CO2 treatments, a light occlusive barrier or medical-grade petrolatum may be preferred for the first 24–48 hours.
Do not apply:
- ❌ Active ingredients (retinoids, AHAs, BHAs, vitamin C)
- ❌ Fragranced products
- ❌ Heavy occlusive makeup or foundation
- ❌ Any product not approved for post-procedure use
Step 7: Provide Patient Aftercare Instructions
Exosomes accelerate healing — but only if the patient supports the recovery process at home. Send every patient home with clear, written aftercare instructions covering the following:
- ✅ Keep the area clean – Gentle cleanse with lukewarm water and a fragrance-free cleanser for the first 72 hours
- ✅ No active skincare – Avoid retinoids, acids, and exfoliants for a minimum of 5–7 days post-treatment
- ✅ Sun protection is non-negotiable – SPF 30+ every morning; avoid direct sun exposure for at least 2 weeks
- ✅ Hydration – Use only gentle, hydrating products approved for post-procedure skin
- ✅ Do not pick or peel – Allow any flaking or shedding to resolve naturally
- ✅ Follow-up appointment – Schedule a review at 2–4 weeks to assess healing and plan next session
🔹 Tip: Patients who follow post-treatment care instructions consistently report better outcomes and higher satisfaction scores — which directly impacts your clinic’s reviews and retention rates.
Storage and Handling Best Practices
- 🔹 Store exosome vials at 2–8°C (refrigerated) until use
- 🔹 Do not freeze non-lyophilized SMART eXo — freezing can compromise the solution’s integrity
- 🔹 Use within the manufacturer’s recommended timeframe once opened
- 🔹 Avoid exposure to direct light or heat during storage
- 🔹 Use low-binding, sterile vials to minimize exosome loss
- 🔹 Never pool or reuse opened vials between patients
For guidance on lyophilized exosome storage and reconstitution, see: Exosome Reconstitution: Step-by-Step Guide
Pairing Exosomes with AVANTA Devices
The most impactful post-laser exosome protocols are built around pairing the right exosome solution with the right device. AVANTA’s SMART eXo integrates seamlessly with all AVANTA laser and energy-based platforms:
- ✅ CO2Pro + SMART eXo – The gold standard combination for post-resurfacing recovery. Exosomes applied immediately after fractional CO2 dramatically reduce downtime and amplify collagen stimulation results.
- ✅ TrioPro + SMART eXo – Post-laser hair removal exosome application soothes skin, reduces follicular inflammation, and supports faster skin barrier recovery.
- ✅ PICOPro + SMART eXo – Enhances post-pico pigmentation clearance and collagen remodeling. Ideal for acne scar and tattoo removal protocols.
- ✅ LightPro + SMART eXo – Supports post-IPL skin recovery and enhances the rejuvenation response.
- ✅ DermaPro + SMART eXo – The microneedling and RF channels created by DermaPro allow exosomes to penetrate deeply, amplifying collagen induction and skin renewal results.
Adding SMART eXo to your existing AVANTA device protocols is one of the most straightforward ways to increase per-session revenue, improve patient outcomes, and differentiate your clinic from competitors offering device-only treatments.
Conclusion
Using exosomes after laser treatment is one of the most clinically impactful additions you can make to your aesthetic protocols. By delivering concentrated regenerative signals directly into post-laser skin, exosomes accelerate healing, reduce inflammation, enhance collagen production, and elevate the overall treatment outcome — for both the patient and the practice.
Whether you’re performing fractional CO2 resurfacing, pico laser treatments, IPL rejuvenation, or hair removal, the post-laser window is the optimal moment for exosome application — and AVANTA’s SMART eXo is formulated specifically for this clinical environment.
📌 For more information on AVANTA exosomes, visit AVANTA Medical.
Frequently Asked Questions (FAQ)
Can exosomes be applied after every type of laser treatment?
Yes. Exosomes are beneficial after virtually all energy-based treatments, including CO2 laser, pico laser, diode laser, IPL, and microneedling. The greater the skin stimulation, the more impactful the exosome application.
How soon after laser treatment should exosomes be applied?
Ideally within 5–10 minutes of completing the laser procedure, while the skin’s channels are still open and maximally receptive. This window provides the deepest penetration and greatest biological response.
How many exosome applications are needed after laser?
A single in-clinic application is standard immediately post-treatment. Some protocols include a take-home exosome product for days 1–3 of recovery to extend the regenerative benefit.
Does using exosomes after laser reduce downtime?
Yes. Clinical experience consistently shows that post-laser exosome application can significantly reduce redness, swelling, and healing time — particularly following ablative or fractional CO2 treatments.
What is the difference between SMART eXo and lyophilized exosomes for post-laser use?
SMART eXo is a non-lyophilized, ready-to-use solution — no reconstitution required, making it ideal for immediate in-clinic application. Lyophilized exosomes require preparation before use. For more on this comparison, read: Why Non-Lyophilized Exosomes Are Superior to Lyophilized Exosomes.
Can patients use exosomes at home after laser treatment?
Yes. Providing patients with a take-home exosome product for days 1–3 post-treatment extends the regenerative effect and supports the recovery process. This is also an excellent retail revenue opportunity for your clinic.
Ready to Add Exosomes to Your Post-Laser Protocols?
Contact AVANTA Medical to learn more about SMART eXo exosomes and how they integrate with your existing CO2Pro, TrioPro, PICOPro, LightPro, and DermaPro treatments.